How to paint a room?
Dec. 29, 2021How do I paint a room? We will guide you through all the steps from choosing the paint to cleaning up after you are done.
Tools needed
⊙ Bucket
⊙ Drop cloth
⊙ Flexible putty knife
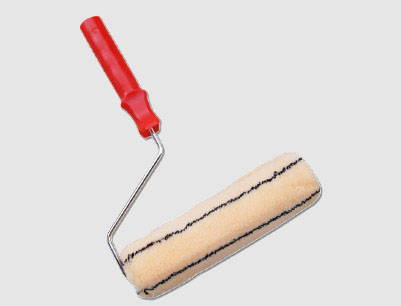
⊙ Long-handled roller
⊙ Paint trays
⊙ Roller frame
⊙ Sponge
⊙ Ladder
Materials needed
⊙ 1 gallon of paint
⊙ Ceiling paint
⊙ Art paper
⊙ Paint samples
⊙ Paint stirring stick
⊙ Painter's tape
⊙ Anti-smudge primer
⊙ Paint trimmer
⊙ TSP or other heavy-duty wall cleaner
⊙ Two 6 in. 3/8 in. lint roller covers
⊙ Wall caulk

Project Step-by-Step
Step 1 Choose a color
⊙ The first question to ask yourself before picking up a paintbrush is: How do I choose a paint color?
⊙ Visit your home center or paint store and have them mix three or four color swatches for you.
⊙ Test your color swatches in different parts of the room to get an idea of the paint colors. Remember that different lighting in a room can change the color dramatically.
Choosing a Paint Finish
⊙ Gloss finishes are the most reflective of all paint choices and are easy to clean. Perfect for wood trim, cabinets and doors.
⊙ Semi-gloss finishes are reflective, durable and helpful in areas that require regular cleaning. Ideal for kitchens, bathrooms, closet doors, trim and utility areas.
⊙ Satin finishes are slightly glossy and therefore easy to clean. Also great for high traffic areas such as children's bedrooms,kitchens, living rooms, entry ways and hallways.
⊙ Matte and flat finishes absorb light rather than reflect it, so they are suitable for walls with imperfections. Perfect for bedrooms and any walls that are uneven, or have texture.
Step 2 Protect your floors and furniture
⊙ Large discs of fallback paper or rosin paper on floors and carpets along skirting boards to protect them from paint splatters and spills.
⊙Place a rag on the floor and on any furniture in the room you are painting. Fabric drop cloths work better for this - they are more slippery than plastic drop cloths.
Step 3 Prepare the walls and trim
⊙Before painting and refinishing, it's a good idea to wash all walls with a heavy-duty cleaner like TSP and trim them. Removing dirt and grease will allow the paint to adhere better.
⊙ Shine a utility light on the wall to look closely for surface defects.
⊙ Knock out any nails and bumps you find in the wall. Fill holes and cracks to fill with mud or patching compound. Sand all patches smooth with sandpaper.
⊙ Be sure to apply a coat of primer over the patch area before painting.
⊙ Remove the socket and switch plates.
Step 4 Paint the ceiling
⊙ Painting the ceiling at this point will prevent paint from spilling onto your walls and trim.
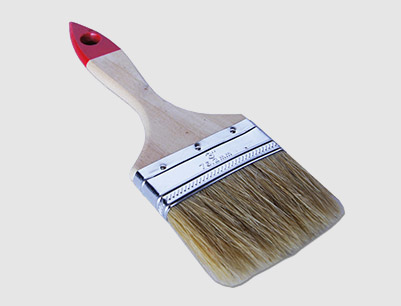
⊙Pour about three cups of ceiling paint into a small container that can be held in one hand. Use 2-1/2 inches of paint to paint the edges of the ceiling along the entire perimeter of the room. Angle the paintbrush. (This is called "cutting in".)
⊙ Use a 3/8 in. nap roller to paint the ceiling from one end of the room to the other. Roll the paint in the same direction, one roller width at a time, overlapping with the previous row. If a second coat is required, roll the paint in the opposite direction from the first coat.
Step 5 Paint Decoration
⊙ In most cases, paint the trim before painting the walls. Allow the paint to dry, then tape the trim and continue painting the wall. If the top edge of the trim strip is not wide enough to accommodate the painter's tape, paint the wall first, allow the paint to dry, then tape the wall and continue painting the trim strip.
⊙ Some things to consider before painting the trim. Are you painting just the trim or are you also painting the windows and doors? It will be much easier to paint the doors if you remove them first.
⊙ Use a 2-1/2 inch high quality semi-gloss acrylic enamel paint. angled paintbrush. Take your time, get the job done, and don't rush.
Step 6 Tape along the edges
⊙ Apply painter's tape (not masking tape) along the edges of the trim before painting the walls. Taping the perimeter of the ceiling will avoid brush and roller marks, resulting in a clean line between the wall and the ceiling.
Step 7 Cut into the wall
⊙ It is a good practice to cut into the walls one at a time and then immediately lay the walls out while the cut-in paint is still wet. The cut-in paint will blend better with the wall paint.
⊙ Pour about three cups of paint into a small container that can be held in one hand as described in Step 4. Use 2-1/2 inches of paint to paint along the edges of the trim strips and skirting boards as well as the perimeter of the ceiling. Have an angled paintbrush.
⊙ Pro tip: Wrap your brush in plastic or put it in a freezer bag to keep it from drying out between cutting coats.
Step 8 Roll paint the walls
⊙ Be sure to stir the paint with a paint stick before you begin.
⊙ Fill the roller tray half full with paint - too much paint in the tray may overflow.
⊙ Load the paint tray with paint into the roller and roll the paint on the wall from skirting board to the ceiling. Roll straight down without reloading the roller to ensure coverage of the wall.
⊙ Again, load the roller with paint and start a new row that overlaps the previous row. Paint the entire height of the wall. The edges of the roller tend to leave paint build-up lines. Roll back over the lines and mix them with the rest of the paint.
Step 9 Peel off the tape and clean up
⊙ Use a flexible putty knife to score along the edges of the tape where it touches the wall before peeling the tape from the trim and skirting boards.
⊙ Always clean the brush and roller thoroughly with hot soapy water.


