Paint Roller Advice: What is the Best Paint Roller for Your Painting Project?
Aug. 22, 2025When you walk down the paint roller aisle at a hardware or home improvement store, the variety can feel overwhelming. Some roller covers are thick, others are thin, and they come in a wide range of colors and materials. The truth is, choosing the right paint roller cover is essential for achieving a professional-looking finish and making your project easier.
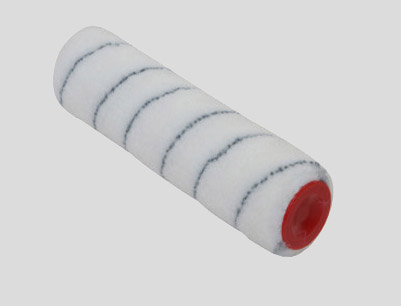
Most paint roller covers are made from woven or knitted materials, and while colors differ among manufacturers, the thickness (or nap length) is what really matters. Knowing which roller cover to use for your surface will save time, paint, and effort.

Choosing the Right Paint Roller Cover Thickness
The thickness of a roller cover—also known as nap length—determines how much paint it can hold and how well it reaches into textured surfaces. Here’s a quick guide:
Rough Surfaces (Stucco, Brick, Masonry, Decks):
Use a thick 3/4″ or 1″ roller cover. This extra thickness allows the roller to hold more paint and reach into deep crevices. A thin 1/4″ cover would tear apart quickly and fail to provide full coverage.
Ceilings and Drywall:
A medium 3/8″ nap roller cover works best for even coverage without excessive texture.
Walls, Wood, and Metal:
Choose a short 1/4″ nap roller cover or a foam roller for the smoothest, most uniform finish. Foam rollers are especially good for doors, cabinets, and trim.
Light to Medium Textured Surfaces:
Microfiber roller covers are ideal because they hold more paint and provide even distribution on slightly bumpy areas.
Smooth Surfaces (Plaster, Finished Wood, Fine Walls):
A white woven short-nap roller cover is best for producing an ultra-smooth, glass-like finish. Using a thick cover here can leave an unwanted “orange peel” texture.
Choosing the Right Paint Roller Size
Paint rollers generally come in two common sizes:
Large 9″ Rollers: Best for covering big surfaces such as walls and ceilings quickly. They hold more paint and reduce the number of trips to the paint tray.
Small 4″ Rollers: Perfect for smaller projects like doors, furniture, cabinets, and trim work. These rollers allow for more precision and less mess in tight spaces.
Tip: Extension poles can be attached to large rollers to easily reach ceilings and high walls without a ladder.
How to Use a Paint Roller
The sooner you start your project, the sooner you’ll enjoy the results. Here’s a step-by-step guide to using a roller correctly:
Gather Your Materials:
A paint roller frame
Roller covers (chosen for your surface)
A paint tray and liner
A drop cloth or plastic sheet to protect flooring and furniture
A damp rag for prep and clean-up
A bucket or can of paint
Prepping the Roller:
Attach the roller cover by sliding it securely onto the frame.
Dampen the roller lightly with a rag to prevent it from absorbing too much paint at once.
Squeeze the roller a few times to ensure even moisture.
If needed, attach an extension pole for hard-to-reach areas.
Prepping the Tray:
Insert a disposable liner for easy clean-up.
Pour paint into the deep well of the tray (about one-quarter full).
Avoid overfilling to prevent spills.
Loading and Applying Paint:
Dip the roller into the paint well.
Roll it back and forth on the grooved ramp until evenly coated.
Apply paint to the surface in a “W” or “M” motion, then fill in the gaps with smooth, overlapping strokes.
Apply light pressure—too much force can leave streaks or splatter.
Clean-Up and Maintenance
Proper cleaning extends the life of your roller covers and prevents dried paint buildup.
For latex or water-based paints:
Rinse the roller cover under warm running water, squeezing out excess paint by hand until the water runs clear.
For oil-based paints:
Clean the roller cover with mineral spirits or paint thinner before rinsing.
Drying:
Shake off excess water and let the roller dry upright or hanging. Never leave roller covers soaking in water, as this damages the material.
Storage tip:
If you’re taking a short break, wrap the roller tightly in plastic wrap or a sealed bag to prevent drying out.
Pro Tips for Getting the Best Results
Always use multiple thin coats instead of one heavy coat for a smoother finish.
Match roller nap thickness to your wall texture for consistent results.
Invest in a quality roller frame with a comfortable grip if you plan to paint frequently.
Replace worn or shedding roller covers—old rollers can ruin a fresh coat of paint.
Final Thoughts
Choosing the right paint roller cover is as important as selecting the right paint. Thick rollers are best for rough and textured surfaces, while short-nap or foam rollers are perfect for smooth finishes. Pairing the right size and nap with correct technique ensures a professional-quality result whether you’re painting walls, ceilings, furniture, or trim.
With the proper roller and preparation, you’ll spend less time fixing mistakes and more time enjoying your freshly painted space.


